


This section will help you if you get stuck on silly puzzles or forget what to do next.
Obviously: /!\ spoilers ahead! /!\
PROLOGUE: THE WORLD, TALE FROM THE OLD LIBRARY
You can talk to everybody before finishing the assignment:
Alex: choose "Are you alright?" to gain affection points with her.
Nathanael: choose "Help me with my homework" to lose affection points with him.
Liam: choose "Meow!" to gain affection points with him.
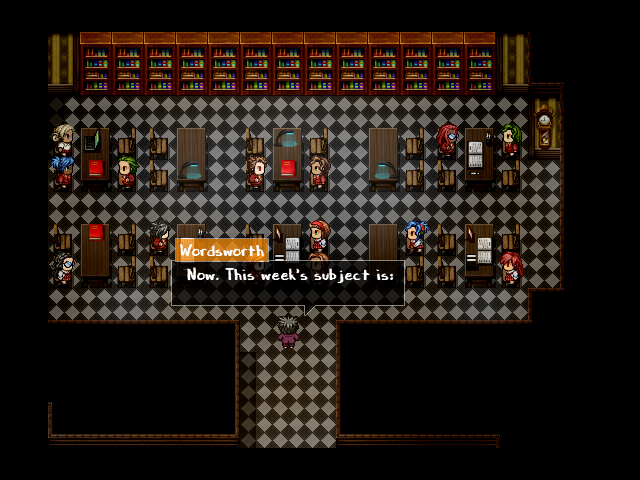
Talk to Ary to get her assignment and go back to your seat (in front of Silloe). Go and ask the librarian for the book on WWII crimes. You will find the book in the first section, on the right corridor (second bookshelf on the lower left corner). Go back to the research room to witness the scene between Liam, Sora and Alex. When Silloe asks you to, go find Alex (In the women's bathroom, second door).
Go back to the research room with Alex to witness what happened to the others. When she runs away, go find her again (she's in the lobby on the left corridor).
Alex: choose "I know, I trust you." to gain affection.
choose "I don't know for now..." to lose affection.
Go back to the research room and find Iris' necklace. When her computer turns on, search info to find her password.
HINT 1: She must have written it somewhere...
HINT 2: The password is in her agenda hidden in the book she was reading.
SOLUTION: IRISxLIAM.
Follow the footsteps to the dark area. Then go to the librarian's drawer to find a lamp, it's locked. She must have left a key somewhere...
HINT: she must have dropped the key somewhere without noticing it...
SOLUTION: The key's in the women's bathroom, in the clogged toilets. Get the plunger in the men's bathroom to withdraw the key.
Open the librarian's drawer and get the lantern. Follow the footsteps again and check the painting to enter the first dementia.
CHAPTER 1: THE SUN, TALE FROM THE GIRL WHO WANTED TO SHINE
The first time you enter the dementia is with Clarisse and Alex. During this part, you have nothing to do except reading the stories on the pedestals. Continue forward until you reach the last book (3rd one).
Once you switch to Iris, you can read the books again if you want. She will respond differently to the stories but apart from that, the stories stay the same.
In Iris' home, talk to each of the family members to collect Iris' memories.
Then, talk to Iris' double and continue onward.
You arrive in two similar classrooms. You'll need to solve the puzzle to continue.
HINT: you can find a hint on what to do in the previous book.
SOLUTION: you need to make an axial symmetry between the two classrooms.
On the left classroom: push the plant in a pot on the left corner of the room, talk to the teacher twice until you hear a small sound, use the standard key on the green lockers to find a bottle of bleach and an old rag.
On the right classroom: search the dustbin to find a standard key, use the old rag and bottle of bleach to wipe the whiteboard, use the scissors to carve the table (the scissors are in Iris' bathroom, on the left next to the candles.
Once it's done, don't forget to save in the hall before entering the last room.
The outcome of the next "puzzle" entirely depends on you:
Manage to avoid all the students until Clarisse and Alex come to your rescue and Iris survives.
Fail to avoid all the students until Clarisse and Alex come to your rescue and Iris dies.
Whatever outcome you had, continue to the next room to confront Iris' double and escape the dementia.
Escape the library by the lobby and discover the altered town. During the cutscene, choose "I'll go check it out myself..." to gain affection with Alex (and Iris if she's still alive). Choose "Alex... Go check it out...please?" to lose affection with Alex (choose "Iris... Go check it out...please?" to lose affection with Iris if she's still alive).
Head over Clarisse's house (down the library, change quarter, and then, first house on the left).
On the morning you have to meet Nathanael downstairs. You can talk with the others first.
While talking to Nathanael, choose "Aren't you worried for your family?" to get extra dialogues with him and then choose "Tell me more." to lose affection with him, or choose "I see..." to gain affection with him. Choose "Tell me more about the others." to continue with the scenario. Nathanael and you both decide to go search for Silloe, it's time you head up to the Herrald Mansion.
CHAPTER 2: THE WHEEL OF FORTUNE, TALE FROM THE LAMB AND THE WOLF
Head to the upper quarters (right, down through the park and left) until you reach the Herrald Mansion.
Enter the Mansion and be projected several hours ago as Silloe enters the mansion, alone. In order to proceed in the mansion, you need to unlock the closet on the right of the stairs.
HINT: look for codes in the Hall, check glowing objects.
SOLUTION: The first part of the code in on a bookshelf on the left of the stairs (15) and the second part is on a trunk up the stairs on the right. (41) The final code is: 1541.
Open the closet to get the key. You can now access the right-winged corridor (up the stairs).
Unlock the corridor right wing, and enter the first room on the right. Check the mirror to trigger a cinematic. Go back to the hallway down the stairs to see a ghost. Follow it and talk to it to access the litigations list. Return to the entrance and talk to the second ghost that appeared to see a flashback. While disappearing, she drops the kitchens key on the floor. Pick it up and open the kitchens corridor on the right.
Go to the upper room and solve the liars' riddle. (Yes, it's pretty easy...) Save before giving the solution to the chef as a mistake will result in an immediate game over.
HINT: check on the various cooks, several are covering for each other whereas one is clearly lying.
SOLUTION: Cook D covers for C and points out B as the culprit, Cook A covers for C as well and exposes B, Cook C covers for both A and D whereas Cook B denounces Cook A and C. Cook B is clearly lying, she's the one who stole from the pantry.
Give the answer to the chef and take the piece of bloody meat before leaving the corridor.
As you walk back into the hallway, Clarisse and Nathanael enter the mansion as well....but in another dimension. You can switch perspectives by hitting the W key on your keyboard. As Silloe, go back to Silloe's room to give the meat to the wolf. You pick the Corridor Left Wing key and can open the left corridor up the stairs.
Do so and check the piano room with Clarisse and Nathanael. You have to solve the puzzle in order to guide Nathanael into playing "the song of fairytales".
HINT 1: There are many fairytales books in the library...
HINT 2: There's a ghost reading in the corridor next to the library, what could he read?
HINT 3: Think about the way one represents music notes in English solfeggio...
SOLUTION: You have to read the diary in the corridor next to the library, there's a ghost blocking it with Silloe but he's not around when you switch to Clarisse and Nathanael. The diary has various colors in a very specific order, find in the library the book that matches each description and color and keep track of the highlighted initial corresponding (the last book is in Silloe's room). Each initial correspond to a music note and the order they appear in the diary gives you the partition:
Grey - Hansel & Grethel -> G
Pink - The Girl Without Hands -> G
Orange - The Fox and the Cat -> F
Green - Good Bargain -> G
Purple - The Jew Among Thorns -> A
Red - The Lord's Animal and the Devil's -> A
Black - The Glass Coffin -> G
Blue - The Fisherman and his Wife -> F
Order: GG, FG, AA, GF.
Once you have the answer, go back to the piano room with Clarisse and Nathanael to play the tune.
Choose "Amazing!" to gain affection, choose "Not too bad..." to lose affection. The piano opens and you get a golden key. The key opens a small golden box in the upper room. Open the box and find the office key. Open the office (right ahead when you left the room with the golden box) to trigger a cutscene.
Now that you have found Silloe, talk to the ghost in the office to get the ballroom key. Go there and find the ghost of Simon Blackdrill to get all the revelations about the mansion. He gives you the basement key before disappearing. Go back to the basement to confront the wolf.
Silloe's the only one who cannot die in his dementia, thus, you have very little to do during the final confrontation. At the end, choose "What about you Nathanael?" to gain affection points with him.
Exit the Herrald mansion and head back toward Clarisse's home. On the way, you encounter Sora, choose "You! Stay where you are!" to lose affection, chose "Is that a rose?." to gain affection.
Head back to Clarisse's room.
After the reunion, head towards the residential quarter to the West of Clarisse's house. Go to the second building after the supermarket and check the intercom. Once it's done, enter Ary's building to begin the search.
CHAPTER 3: THE HERMIT, TALE FROM BEHIND THE SCREEN
Once inside, head towards the third floor and check the last door on the left. You enter Ary's apartment. Check the note next to the TV and go to the second floor. Check Ary's computer and leave the building to go back to Clarisse's house.
Talk to Alex on the second floor and to Nathanael near the painting. Choose either of the two first choices to gain affection. Depending on which one you choose, select "I know how you feel..." or "Isn't it tough?" to gain affection. Wait until the others come back in order to take Sora with you.
Once you gathered in front of the house, choose "I won't." to gain affection with Nathanael. Head back to Ary's apartment and check the computer again to enter her dementia.
Meet Raiel and use the teleporter to your left. In this room, place the electric energy ball on the yellow spot in order to open a path. You can now access the menu through the computer on the right (it will be your save point in this dementia). Take the teleporter to enter another room with a similar puzzle.
In this room, place the blue ball on the blue spot to open a path on the right. Take the purple ball and place it on the glowing spots in order to teleport it on the other side. Cross the bridge and place it on the purple spot to open a new path on the left. Put the red ball on the glowing spots to teleport it on the other side and push it on the red spot. From now on, you'll have to push the blue and purple balls on the glowing spot (the one on the North) and on their respective spot (blue on blue, purple on purple).
In the next room, you have to choose a path by walking on the directional arrows. You can only move in the same direction the arrow points.
SOLUTION: From the teleporter, walk on the up arrow, then on the right one, and finally on the down one to reach another teleporter.
Once you take the teleporter, you'll encounter Raiel and learn more about him. After he left, choose "That was a bit harsh..." to gain affection with Sora.
Go and unlock the 4 keys by solving the puzzles in the rooms.
HINT1: When you move the orb on the left, the one on the right goes in the same direction.
HINT2: When one orb is blocked against a wall, that doesn't mean that the other one cannot move...
SOLUTION: Here is a non-exhaustive list of ways you can solve those puzzles.
1 KEY: Push 3 left and 3 down.
2KEY: Push 2 down, 2 right, 2 down, 2 right, 2 up, 2 right, 4 down.
3 KEY: Push 2 down, 2 left, 4 up, 2right.
4 KEY: Push 1 up, 3 left, 2 down, 1 right, 1 up, 1 left, 1 up, 1 right, 1 down.
Go through the breach in order to access Ary's desktop and join Raiel. Follow him in the "Root" file and try to open the "Down the rabbit hole" folder. It is protected by a security question. From here, all you need to do is search her personal data in order to find the answers to her security questions and progress deeper into the root file. Every information can be found in the desktop files.
QUESTION 1: "Date of Birth?"
HINT 1: Search the "Photo" folder...
HINT 2: Input the numbers without the dots separating them.
SOLUTION: Check the last photo on the right in the "Scan" folder (in the "Photo" folder). The number you're looking for is 20041993.
QUESTION 2: "Mother's Maiden Name?"
HINT 1: Search the "Mum" folder...
HINT 2: Input the name in capital letters, like in the article.
SOLUTION: Check the 4th picture called "Obituary". Her maiden name is LUHMER.
QUESTION 3: "An Expression of Self?"
HINT 1: The art holds the key...
HINT 2: Check the "Art" folder and try to find a commune characteristic to all artworks.
SOLUTION: They are all self-portraits. Enter SELF-PORTRAIT in capital letters and mind the "-".
QUESTION 4: "Name the File You Are Searching For."
HINT 1: The "file" you are looking for stands for the person you are looking for.
HINT 2: You learned Ary's mother name in the Obituary...
HINT 3: Make sure to you use lower letters in the first name (Ary) and capital letters for the last name.
SOLUTION: Input Ary STEINS.
Once you input the answer, you will trigger a cutscene and Raiel will give you access to new files in order to answer the security question.
QUESTION 4bis: "Name the File You Are Searching For."
HINT 1: Raiel unlocked a "deleted" file somewhere that can help you...
HINT 2: Check the "Recycle Bin" on the desktop.
HINT 3: Make sure to you use lower letters in the first name and capital letters for the last name.
SOLUTION: Input Ariel STEINS.
You can finally reach Ary. Talk to Raiel and open the "Ary.chr" file to switch back to Ary.
Progress onward as you reach the altered version of her apartment. Login and you are now reunited with everyone. During the cutscene, choose "What's gotten into you?" to lose affection with Ary, choose "Are you ok?" to gain affection with her. Later in the discussion, choose "I don't know..." to lose affection and "I don't understand..." to gain affection. Choose "You can trust us." to gain affection and "Just tell us what happened to lose affection. Lastly, choose "Don't interfere." to lose affection and "Interfere." to gain affection with her.
Watch as Raiel takes Ary with him, save, and enter the RPG MAKER VX ACE application.
BATTLE AGAINST RAIEL:
HINT 1: Raiel attack on one turn and rest on the next one. Use this time to exit your cages.
HINT 2: You have up to six turns to end the battle, otherwise Ary will be killed no matter how well she's doing.
HINT 3: If you're doing well, it is possible to win the fight on turn 5.
SOLUTION: Protect Ary on turn 1 with all three girls, attempt to escape the cages on turn 2, protect Ary with all three girls on turn 3 (except if you failed one or two locks last turn), escape cages on turn 4, gather energy on turn 5 with all 3 girls.
Win the fight before turn 6 and Ary will be saved, failed to do so and she dies.
Exit Ary's dementia and her apartment. If Ary is still alive, make her read her father's note on the first floor of her apartment to gain affection with her.
Go back to Clarisse's house and watch the cutscene.
From now on, the ambiance and relations between the characters will vary depending on how many of them survived (Iris and Ary). During your night talk with your friends, if Ary survived choose either "Glad to hear it." or "You can thank yourself." to gain affection with her. When Sora asks about how you feel, your options will depend on how many traumatic experiences Clarisse experienced:
If both Iris and Ary are dead, your only option will be "I'm terrified.", If Iris or Ary is dead but the other one survived you will have the choice between "I don't know..." and "I'm terrified.". Neither of this choices can give you affection points. If both Iris and Ary survived, you will have the choice between "I don't know..." and "Maybe...happy?". Choose "I don't know..." and you will gain affection with Nathanael, chose "Maybe...happy?" and you will gain affection with Nathanael, Sora, and Ary.
The next morning, Nathanael, Sora and you are in charge of inspecting the high district area. Head towards the park to see that Sora seems to hear a strange voice... As she touches the rose, you enter the fourth dementia..
CHAPTER 4: THE EMPRESS, TALE OF THE QUEEN OF ROSES
Read the inscriptions on the engraved stone to unlock a door. Enter the room and drink the tea on the table to be able to fit the tiny door. Go North, to the next area and pick a path (it doesn't matter which one). You arrive at the library.
To unlock the next door, you'll need to unlock four locks by completing small puzzles/tasks in the book worlds. The small notes/letters on each room will give you hints on what to do:
SOUTHWEST BOOKSHELF:
"A true lady never shows her heart and keeps the curious away."
HINT: People need to look away...
SOLUTION: Turn every student until each of them cannot move.
Sora is now alone and you've unlocked the first lock. You can also pick the helmet toy in the room.
NORTHWEST BOOKSHELF:
"A true lady can only play with proper toys, for the others twist imagination."
HINT: There are four different toys in the book worlds, present the one you think is correct.
SOLUTION: The Plastic helmet is in the Southwest bookshelf world, the Plastic sword is in the Northwest bookshelf world, the Fluffy teddy bear is in the Northeast bookshelf world. Present the Fluffy teddy bear to unlock one more lock.
SOUTHEAST BOOKSHELF:
"A true lady never goes out without her adornment."
HINT: Sora needs her flower hairpin, you'll have to find something that could replace it.
SOLUTION: Go to the Northwest bookshelf world and pick the orange flower on the ground. Go back to the Southeast bookshelf world to put the flower in Sora's hair, unlocking a new lock.
NORTHEAST BOOKSHELF:
"A true lady never speaks her heart, for she must learn how to behave around commoners."
HINT: You'll need something to prevent her to express her emotions...
SOLUTION: Go to the Southeast bookshelf world and pick the box on the bedroom's dresser. There's a roll of tape in it. Go back to the Northeast bookshelf world and put the tape on Sora's mouth to prevent her from expressing herself. This will unlock the last lock.
You can now access the door on top of the library area, in the next zone you'll have to dodge spiders in order to cross the room. But the rules previously listed applies here as well, you won't be able to turn back on this room, so be careful before moving up. Wait until the spider looks away and run.
The next area is the same, except you can now move freely. Drink the potion to temporary be able to see the spider's vision and cross when you see an opening.
(You'll have to go right if you want to be able to cross.)
After the cutscene, you'll wake up in a dream sequence again, go up until you see Asmodee, Liam and some of your classmates. Talk to Asmodee to end the dream sequence.
(You can talk with the others before for extra dialogues.)
In the next sequence, you'll have to dodge spiders again, use the potion to be able to see the spiders' pattern.
SOLUTION: You can't do everything on the first try, drink the potion, go right and up. hide in the small cave and wait for the middle spider to go right, quickly go out of the cave and go left and up. Mind the spider on the top as well.
Enter the chimney and meet up with Nathanael inside the dollhouse. Choose "Hug him back" to gain affection with him. Choose "Push him back" to lose affection with him. If you decided to hug him back and if your affection level with him is high enough, you have the oportunity to chose between "We're friends!", "I've missed you too!", and "That is so you...". Each of those answers will raise your affection level with Nathanael even more.
In the dollhouse, you can interact with several objects and "people". The brown-haired man is looking for a letter and the blue-haired woman is looking for something unknown. Go to the upper left bedroom to find the letter, bring it back to the man to obtain wire. Use the wire in the bathtub to acquire a tiny key. Use the tiny key on the dressing table to find a hairpin. Give the hairpin to the blue-haired lady to get a small key. Use the small key on the small cabinet in the hallway to obtain a gold key and a note.
HINT: The note will give you the information on where to use the gold key... Look it up on your menu!
SOLUTION: The world's knowledge refers to the books, use the key on the bookshelf in the upper left room. Its description says it's full of books from all over the world.
Touch the cradle to access one of the last areas.
In this area the principle is simple: witness all the memories and use them to solve a riddle to access the next memory. Talk to the blue-haired woman to start the first one and so on...
RIDDLE 1:
"Ties we share, that time and death themselves couldn't break."
SOLUTION: blood ties
Remember to use lower cases!
RIDDLE 2:
"I'm sometimes a girl,
I'm sometimes a boy,
You can play with me,
As I am a toy."
SOLUTION: doll
Remember to use lower cases!
RIDDLE 3:
"I was always there, and yet no one can touch me,
Because of me, countries and men have fallen,
From the blood I have stolen,
New pages were written in History."
SOLUTION: war
Remember to use lower cases!
RIDDLE 4:
"Playing by the rules and living in agony,
Complying like a doll bound by fate's string.
Only one word can set me free,
For if I'm not a Queen I am a -....-."
HINT: For this one, you have to find the missing word in the riddle, the rimes can help you...
SOLUTION: king
Remember to use lower cases!
After unlocking the last door, go up and enter the final area.
You'll have to run from the Spider Queen in a chase sequence.
HINT: There is only one path that can set you free,
all the other ones are dead ends that will get you caught.
Look for small clues on the decor to help you decide which path is safe...
SOLUTION: The safe paths don't have spider webs near them, go:
middle, right, left, middle.
Manage to escape and you'll be saved by Sora before leaving the dementia with him, fail to escape and Sora will sacrifice to let you out of the dementia.
Once it is done, return to Clarisse's home to end the chapter and start chapter 5!
CHAPTER 5: THE LOVERS, TALE FROM A FALLEN ANGEL
- Game momentaneously on hiatus -
InSaNitY
